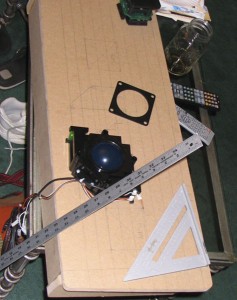
I got to work on the CP top yesterday. This is, in my opinion one of the most critical parts of the build. This is the interface between the user and the machine. So, it has to be comfortable and usable. Earlier on, I mentioned some of the ideas I was having. I have settled on a design and am feeling really good about it. So, it is time to transfer the idea from the paper (and my head) to wood. After tons of measuring, drawing, realizing that there is 3/4 in. of MDF where the track ball was supposed to be, erasing, and redrawing, I finally was able to start routing. I started with the area for the trackball. The trackball is held to the CP with a metal plate. 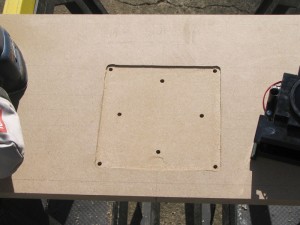 The plate has 8 screws that are welded to it. 4 of the screws are for mounting the plate to the CP, and the other 4 are to hold the TB to the mounting plate. What is great about this, is that you do not need to loosen any screws from the top of the CP to get access to the trackball if maintenance is needed. I will have a laminate CP overlay as well as plexi over the top of that, which is held in place by all the push buttons, which would all be wired, so clearly I can not take the whole CP apart just to get the trackball out. This trackball with top plate design was ideal. The plate is mounted on top, so the screws hang down through the CP. I drilled some holes for the screws and the TB screw sockets to make sure that when it was in place, and I traced it, it would always line up. I then routed out where the TB plate would sit. I only went down just a hair more than 1/8 in. so it would sit flush with the surface. Then I started on routing the areas for the joysticks. This was all going very smoothly.
But then, for what ever reason (read ADD) I lost my mind while routing and went a little over a half inch out of the line on the player 2 Joystick. I just sat there in awe of this heap of sawdust and a huge groove that ought not be there. So, I finished routing the space that should have been routed. I then did player one JS socket (without the extra slot). Again I tried to fix the issue with wood filler. I have to say that the more I work with this stuff, the more I dislike it. It always shrinks up and takes a few applications. But worse is that sometimes it pulls away from the sides. After an hour of drying and shrinking, I got a screwdriver and broke it (the wood filler) out of the evil groove. Having recently been introduced to Bondo while restoring my Centipede, I decided that I would start to use this as my go to filler. I put a piece of wood next to the groove so the whole thing would act as a mold, then I filled the hole. Within about 15 minutes it was hardened, sanded, and good to go. Tonight I will be drilling button Holes.
 |
 |

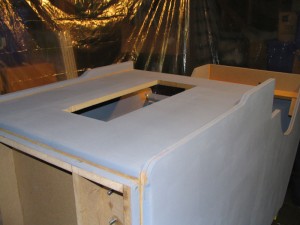 I worked on the second coat of primer today. (I sanded the first coat yesterday). This was a second can, and I have to say how nice this primer was to work with. It felt much smoother than and not as thick as the first can. I thing I might have gotten a bum can of primer or something. I should mention is that I had the Home Depot add a black pigment to the primer. I would have liked the primer to be even darker, but they said that this was as dark as they could take it without goofing up the make up of the paint.
