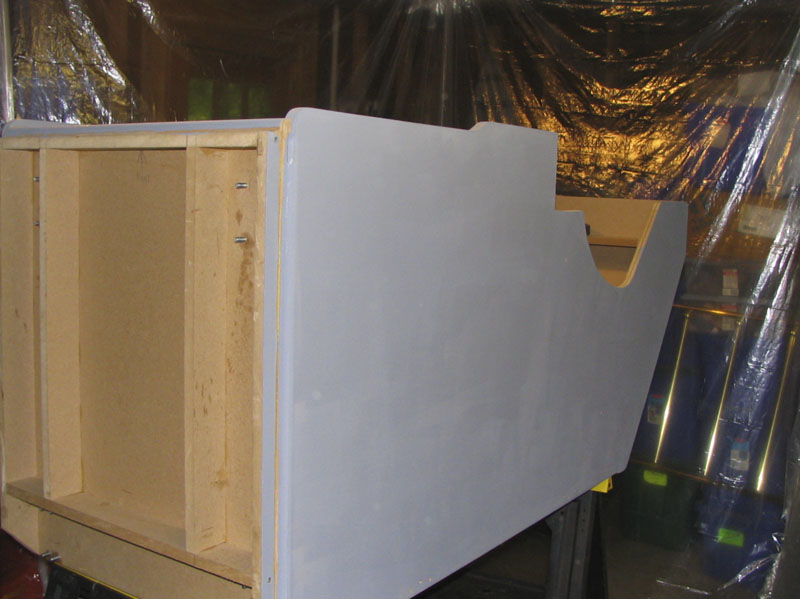
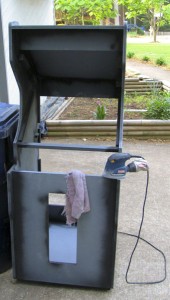
Gluecade lives!!! Clamps and Elmer’s glue make the world go round. The cab seems solid so I think I am somewhat out of the woods. I put a new full layer of black paint on last night. I tried a more nappy roller at the recommendation of my next door neighbor. He said that it would give me a more mirror smooth finish. For the most part he is right, which makes me wonder about all the stuff I had read. What I did not count on is the little freaking hairs from the roller that stuck all over the finish. I guess I will be sanding and painting again tonight. I will only be redoing the outside sides and front as it is a nice smooth surface inside and on the back and no one will really be seeing it on a regular occasion except for me.
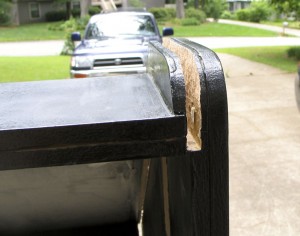
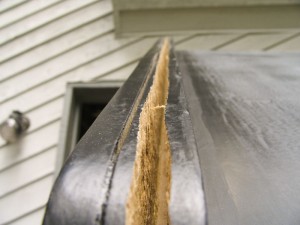
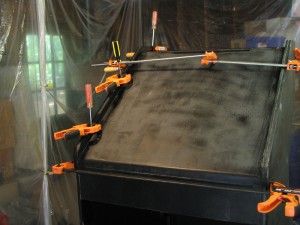
I went down to the garage yesterday and pulled the cab outside so I could inspect it in the sun to get a better feel for any left over damage. It turns out that the other side (right) had fractured nearly front to back along the top just like the left side. I had not seen this as it was somewhat dark in the garage, and it had not totally split so it was just a hairline fracture. I decided that this was very much structural, so I got my rubber mallet and lightly started hitting inside my cab towards the right. After about 6 hits (not hard, just direct to the area) I started hearing light cracks. I kept going and then heard ‘pop’. I looked at the fault line and it was a near perfect break. I then glued the snot out of it like I did on the other side and again clamped en mass. I checked it this morning. This side appears to be solid again.
 |
 |
 |
I found another long crack was along the right side at the coin door board (kick plate). This was harder to work on as it was still connected to the bottom as well as to the clamped top. I got a screwdriver (flathead) and pushed it into the crack. I then started pouring glue in and forcing it into the crack with my finger. This is starting to sound dirty. After I had done this for a while I clamped the sides near the top of the coin door board. I have no idea how deep the glue got, but there is a lot in there.
I also split and glued the CP area fractures near the t-molding slot mentioned earlier.
I am really concerned how much damage is still lurking in places that I can not see. This morning it is feeling solid, but with heat or humidity something may show up later (after it is painted).
Perhaps I should strike the BLACKOUT idea and go with GLUECADE.
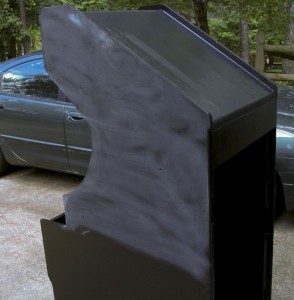
Paint sure does go on nicer than primer. Something that is kind of cool is how the paint spreads once it has been rolled on. Initially I can see roller marks. Once the paint has sat for a while it sort of spreads out and forms kind of a sheet of paint. It is very smooth. I painted it and sanded between coats. I laid down 2 full coats to start off.
 |
 |
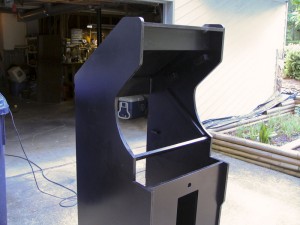 |
I fully sanded the thing and put in my heat vent (a slot hole cut at the union of the very top and the angled piece). This was to allow the escape of heat from the computer and screen. All was going well Too well…(thrown in for dramatic effect)
I fully dusted off all the residual paint powder, and got the floor swept up all nice and tidy in my little paint booth. I was about to do my final coat of black. I wanted to paint more of it at eye level so I decided to put the cab up on saw horses. I have gotten pretty good at moving this thing around by myself, so I leaned it back and set the top back of the cabinet on one saw horse. I lifted the bottom with the other saw horse in front of me so I could push it into place with my foot when I got it lifted. I have done this several times without issue. BUT! What I did not see coming is that paint makes smooth surfaces very slick. The whole thing slipped right off the sawhorse and went crashing onto the floor. Everything seemed to be slow motion. I watched the side and the top vibrating apart and another board from somewhere flying away spiraling through the air. After a lot of screaming, yelling, and a violent toss and slam of my closest sawhorse, I walked out of the garage with a sick stomach and in tears. I am sorry if that is just not manly, but it happened. I have been working on this thing for 5 full months now. I could not go in to see the full extent of the damage.
(AT) Do not let an object become more important than your family. Also, try not to let said object cause you to unleash anger in a way you might regret. Sure, I write this now 4 years after the fact, so I suppose it is easier to say, but it is something that I am more mindful of. The cabinet was a stupid piece of wood. But that stupid piece of wood consumed much of my thought back then. He knew it was important to me, but I exhibited something that was not within the realm of acceptable. As a dad, this is a moment that I regret. Your kids look at you for example and this was truly not an example that I wish to set. I knew it immediately. After I slammed the saw horse, I looked over at him. My son watched the whole thing. I was in a bad place. It was compounded by my actions. I got down on my knees and looked him in the eyes and apologized to him. He did not deserve that.
 Back to the story
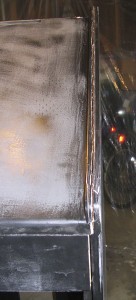
I finally got my nerve up. If you remember from early on, the top and angled back was glued into a channel. The MDF split straight up from the channel to the top on both sides. It seems to have followed the groove that was cut to hold the t-molding. So much of the area around this was just fractured into little tiny pieces. So, front to back it was completely separated at the top. The board that was to hold the Fluorescent light completely is gone (probably the flying piece). Near the back of the cab in the top left rear corner was severely dented in (probably the impact point) causing the MDF to separate into sheets. There are many other places that have stress fractures as well.
After some time of pulling myself back together, I started gluing the leaves of MDF back together. I figured that it would be better to start with rebuilding strength before trying to re-attach the top, back and side. 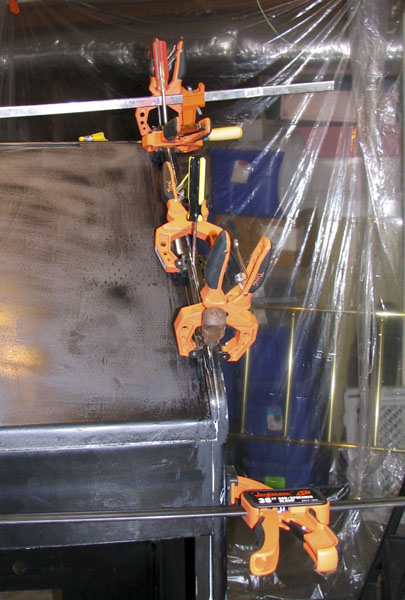 I spread the leaves apart and put as much glue in there as I could get and clamped it hard. After about a half hour I drenched the left crevasse with glue all the way from the front to the back. I used a paint mixer stick to spread the glue so both sides were solidly covered. I then clamped with 36 in clamps at the very front and back. Slowly I tightened the clamps and brought the top, and back together with the side. I put flathead screwdrivers into the t-molding groove to maintain the groove while everything was clamped. Then I clamped the full 3/4 inch lip. This way pressure could be put across the whole piece. I spent the next 15 minutes wiping up glue drippings.
Down on the left side on the corner that will support the CP, that MDF has split but it is still tight. I am trying to decide if I want to split it further and re-glue it or to leave it as is and just t-mold it. If I do not split it, it will always be weak point. I will probably need to split and glue it
I think I may sue the sawhorse company for pain and suffering.
On a different note, I worked more on the marquee seeing as how I WASN’T PAINTING! I was playing around with different color treatments. I really like the blue direction.
I spent the past 2 nights working on the marquee. I originally started with the same style as the CP and sides. It just did not groove with the title BLACKOUT. I finally got rid of the red/orange bars. I do not necessarily like the blue lines at the bottom either. I had it on the CP and the side art so I felt that it should somehow play into the marquee as well. I had tried a chrome outline, but I eventually scrapped it as I like the stark blackness.
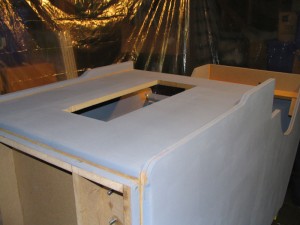 I worked on the second coat of primer today. (I sanded the first coat yesterday). This was a second can, and I have to say how nice this primer was to work with. It felt much smoother than and not as thick as the first can. I thing I might have gotten a bum can of primer or something. I should mention is that I had the Home Depot add a black pigment to the primer. I would have liked the primer to be even darker, but they said that this was as dark as they could take it without goofing up the make up of the paint.
Tonight I started zeroing in on the art. I had originally used the program CP Designer to make the layout as it had all the buttons, joysticks, and trackball to scale in the software. I then took that and made the original artwork in Photoshop. After all my drilling and shaping, I had a real life, full scale, physical thing to work with and visualize with. So my layout changed a little. Tonight, I made my Photoshop file match the physical panel. I am not sure if my original design will work how I imagined it. I am still tinkering with it though. One thing I am sure of is that I am going to be using this color scheme. But most likely, It will stay close.
So, below is my updated art and a second one with the stuff on it.
Ok well I have now started into the paint stage of the game. Wow, what a long strange trip its been. I have decided to use both spray paint and rolled paint on the cab. The only thing is that you can not use standard latex paint with spray paint as the oil and latex will argue. I decided to use oil all the way around. As I understand it, it will give a smoother and stronger finish. The other plus is that I can safely spray paint over the top of the rolled stuff. I found the same flavor spray paint as the oil I intend to use so it should all match up nicely. The Primer is Kils, and the spray is Rust-o-lium Satin Black.
 I did the CP top with completely with spray as it would eventually be covered up anyway. I am really just painting it in case any edges ever show through. I sprayed a couple layers of primer, then sanded with 300 grit sand paper. Once I got it nice and smooth, I sprayed it with black matte. I also sanded it between coats here as well. This was way overkill for something that no one would see, but I would know.
I sprayed the CP outside and did notice that there were a few flecks of dust afterwards. Not a major thing as it would be covered, but I do not want this on the cabinet. Being that I live in Georgia (the pollen capitol of the world, and Canada), I decided to make a makeshift paint booth. This way I can keep sawdust and pollen out (sort of) and paint fumes in (sort of). Seemed like a good idea and seems to be working (sort of).
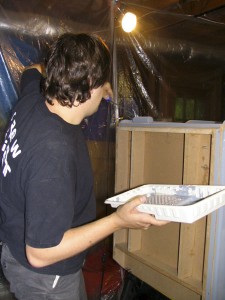 I wanted to see what the difference would be with spray vs. foam roller. I have read that using a foam roller will give a smoother finish than a standard nappy roller. Frankly I am a little concerned that the rolled paint will not be as smooth as a sprayed surface. More, I am worried that you will see roller marks. I poured a good portion of primer into my pan and started rolling the cabinet sides. Two things that struck me were how thick, and not smooth the primer was. I am going to finish the first layer of prime then sand. I am hoping that this is a primer thing and the paint will go on smoother.


