I had a lot of involvement in my sons scouting years. One of the big events was the Pinewood Derby. I was responsible for it several years back. I finally have recovered and wrote about it. Again I retro dated it so it fell in the proper timeline. You can read about it HERE.
This year, I took the year off of building a car (not by choice). Instead, I took the helm of the whole Pinewood derby. It may surprise you, but the pinewood team (our pack’s leadership) actually spent a considerable amount of time discussing how we could make the whole PWD a smoother experience. This includes everything from the (pre) registration, to the weigh in, to the event it self. When my son was in his first year of Cub Scouts, we just showed up under the delusion that these things just somehow happen. It was really amazing how much time we all spent working on all the little details. We wanted it to be the most massively fun experience possible for the kids. It was an extremely successful and positive night for all.
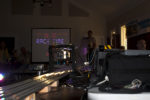
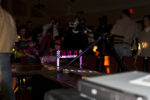
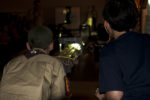
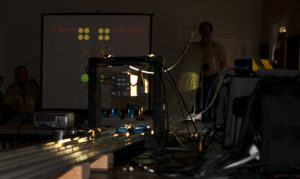 Being techie by nature and profession, I have been adding more and more technology each year. My focus has prior to this year has mainly been on the extra stuff. You know, all the techie stuff not related to the track. This year was really over the top. We were using 3 projectors sporting racing software, custom ‘Christmas tree’ racing software, and Pinewood TV. We used a full on sound system with speakers all over the place to envelop the spectators and bring them deeper into the event. It was probably overkill, but so worth it.
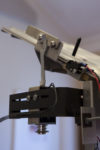
Last year (2011) we had a fairly serious glitch. The racing software would not communicate with the track and the track stopped… em… tracking. It was an all out frantic search for paper and pencils and trying to decide how to run the race off of paper. In reviewing the issues, this came from an incomplete understanding of how the system worked, and the ins and outs of the race software. Being that I was responsible for the running of this thing, I was going to understand it. Ultimately I found that it all came to a dead halt because of 1 silly little teeny tiny switch. When I meter’d it all out, the switch would not ‘close’. In English, it would not reset the track. If the track is not reset, it (the track brain) stops sending information to the computer. The switch was totally FUBAR. It looked fine. It clicked fine. But when I metered it, there was NO internal connectivity either in the open or closed set of leads. Not sure what happened, but it was done. To compound this when I looked at how it was attached to the track, it was loose (floppy loose), and poorly placed. I decided to re think how it was built. I replaced the switch with a new one, and moved where it was located. I made sure that this was a really solid placement. More, there was a lot of mechanical movement in the area where the switch lives. A lever holds the starting pins in place (The starting pins hold the cars in place at the top of the track). When this is released, several fairly heavy springs on the back pull the starting pins causing them to slam down and under the track thus releasing the cars. There was really no need for so much travel, nor that much umph ( from the springs) to get it there. This was solved with a strip of squishy foam cut down to fit in the little void behind the starting pin block. This reduced the jarring ‘clack’ down to a gentle ‘doof’ as well as reduced the vibration and stresses placed directly on the switch.
I was feeling some pressure to make sure this thing rocked, so I took some time to learn the racing software inside and out. As with most cottage businesses, the pinewood software started because a den dad had a need and a skill set to match. He started writing the software and it has been growing ever since. While looking through it, I found that it was actually very well written with lots of great features. More, I found out that we could have actually used it during last year’s emergency using a points system mode vs. the time based races which we were using. But one can’t change the past. Oh well. Trying to be prepared in case the worst happened again (which I was nervously confident that it would not), in addition to the software, we were armed with mass preprinted spreadsheets and pencils.
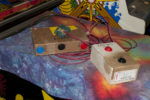
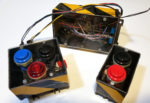
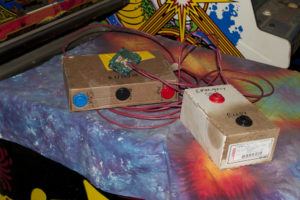 Another upgrade I built last year was the ‘ready’ system to help simple communication between the cogs of the race. When it is loud (crowds of kids and mass excitement), it is hard for the emcee to know if the cars are ready on the track, or if the computer people are ready for the next group to run. So I addressed this by building a ‘ready’ system which would seem natural, but served a very important function. I started by writing a couple of programs in Processing and the Arduino that would simulate a “Christmas Tree”. Instead of cars crossing a line (telling the computer when it could start) in a real world drag race, I made a button box which sat at the computer position and one start of the track (for the car set up guy). When the computer (pencil and paper) was ready, they would hit their ready button. The same went for the car set up folks. When and only when both groups were set up could the race begin. This was all interfaced through an Arduino into Processing. The races were started by the car set up person. The lights would run the way a real Christmas Tree would run, and when the green lights hit, they would release the cars. This was all accompanied by a ferocious set of sound effects to match. So when they would hit their ready buttons, engine sounds would rev (it was loud and deep enough you could feel it in your chest). The race would start with the Christmas tree lights on the screens blinking down, accompanied by beeps (remember the sounds from the start of the video game Pole Position (if you are old enough to remember) Boop boop Boeeeeeeep!). At the green lights, the sound was of screeching tires and wild engine sounds . When I did the sound design for the audio side of things, I panned the car racing sounds so the sound actually attempted to follow the cars on the track. A PWD race is really only a couple of seconds long, so I faded the race off into the distance. Lastly, there was an emergency stop button on both button sets. This was for moments where some unforeseen ‘thing’ might pop up. Either party could press stop and it would kill the sound and reset the display. If the emergency stop was pressed, I used this cheesy VW Bug ‘meep beep’ noise. In contrast to all this crazy high powered stuff, this rather anemic sounding car horn added a touch of humor. It all worked out very well. The whole thing was put together in a couple of days. It was butt ugly, but it worked wonderfully.
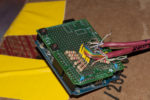
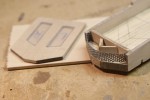
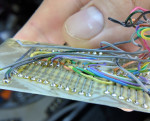
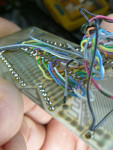
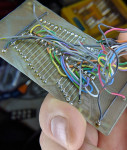
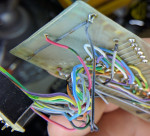
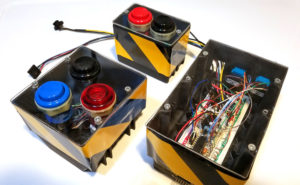 This year I improved on the system quite a lot. I did three things. I built the system to be more rugged, added lighting effects, and added automated starting of the races so it completely sync’d with the sound. I gutted the cardboard boxes used last year and bought some electrical wall boxes. These were spray painted black (because black looks cooler than blue). Instead of using a standard wall plate for the buttons, I made clear plexiglass covers. I have been talking to the boys about how electronics live all around us and I wanted the kids to be able to look inside the box to see what was making this thing tick. I also reduced the project to a breadboard so they could see how robust a prototype could be (it doesn’t always have to be perfectly printed circuit boards all the time). I found some wonderful reflective yellow and black warning tape at Harbor Freight. This was placed on the boxes which did a killer job of making them look rather menacing. I also added a clear red start button and inserted a wicked bright led so that when the race was set up and ready, it would blink bright red for all to see. The 2 button boxes were connected to the main box via Cat 5, so set up and tear down was super easy.
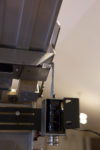
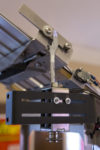
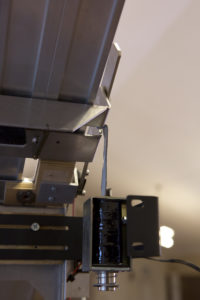 For the automated starting of the races, I bought a solenoid from Sparkfun and built a little mosfet circuit to run it (also housed in the main circuit box). I used one the ears off of a set of server rack rails to mount the solenoid to. Without mutilating the track (which was out of the question) there was no way for the actual solenoid plunger to reach the release lever (which drops the pegs which hold the cars in place). I made a little whachamacallit to attach to the plunger so it could reach up and wrap around the lever. This was cut out of an old metal computer case (my go to material for all my little metal whachamacallits). I did not want to manage multiple voltages (a 12v system system for lights, and a 24v system for the solenoid). I found that I could under powered the solenoid with 12v. With 12v it had just about enough push that it came pretty close to releasing the start lever as is, but it was not quite enough on it’s own. The solution came through many of the methods used to get PWD cars to run faster. The movement needed to be slicker and smoother. I used a heck of a lot of graphite on all connective surfaces, and minimized any points of friction by sanding a filing my plunger widget completely smooth. These modifications were very effective and the release was flawless. During the PW derby itself the mechanism only failed 3 times during the 100+ races, and 2 of those were due to user set up mistakes. Sorry for the braggin’ moment there, but rarely do projects work that smoothly. I had to take the moment when I could.
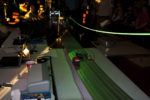
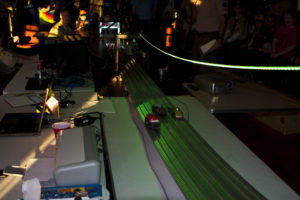 For the lighting, I added a 5 meter strip of RGB LEDs. This was controlled by the same Arduino (actually BoaArduino this year) as the button system. I had to move a couple of pins around from last year as I needed the PWM pins for the LEDs. The track is made out of aluminum which takes light very well. I suspended the strip about a foot above the track. When the ready buttons were pressed, the lights would rev up to match. When the race would start and the lights would blink in synch with the sound which would be in synch with the screen. When the lights went green on the screen, the track would go ape dooky with a strobe of green and bright white. Then when the racing was finished, the lights faded down to red, then down to dim red. If an emergency stop was called, the lights would sit and blink red on and off for about 4 seconds like hazard lights.
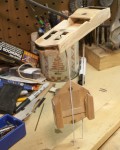
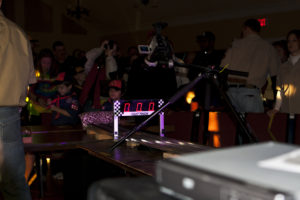 Mentioned above, we also had TV. I brought in a small video switcher (straight cuts only, nothing fancy). I made a 5 minute looped graphic video of racing flames, checkered flags, and a logo. This would play on the screen in between races. There were 2 track cameras. One pointed up at the starting line. This was suspended right over the track on a sort of wood bridge that I made. This was a great shot. You could see the race start and then the cars would fly right at, then under the camera. the camera lens was sitting just 2 inches above the maximum height allowed for cars. (The 2 extra inches was so that I would not get yelled at by some parent who thought that I had somehow had lost their kid the race. While the PWD brings out some of the best qualities in a kid, it brings out some of the worst in some parents (Just sayin’). The second camera was placed at the end of the track to catch the cars as they went through the finish line. My son actually did the video switching for the night and I must say, he did a great job.
 You can not pull off something like this without a great team, and man, all of our Pack 553 leaders stepped up and helped out wherever needed. We started the load in and set up at 10am (the morning of the event), and finished about 5 minutes before it started. While everyone was working hard, no one was rushed. We just did everything we could while we could. After the PWD, it came time to tear down and pack up the car. I will tell you that everything in that room (aside from the track) fit in my Prius. Granted, it probably would have popped if I poked it, but it handled the load.
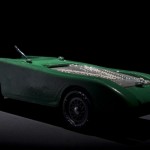
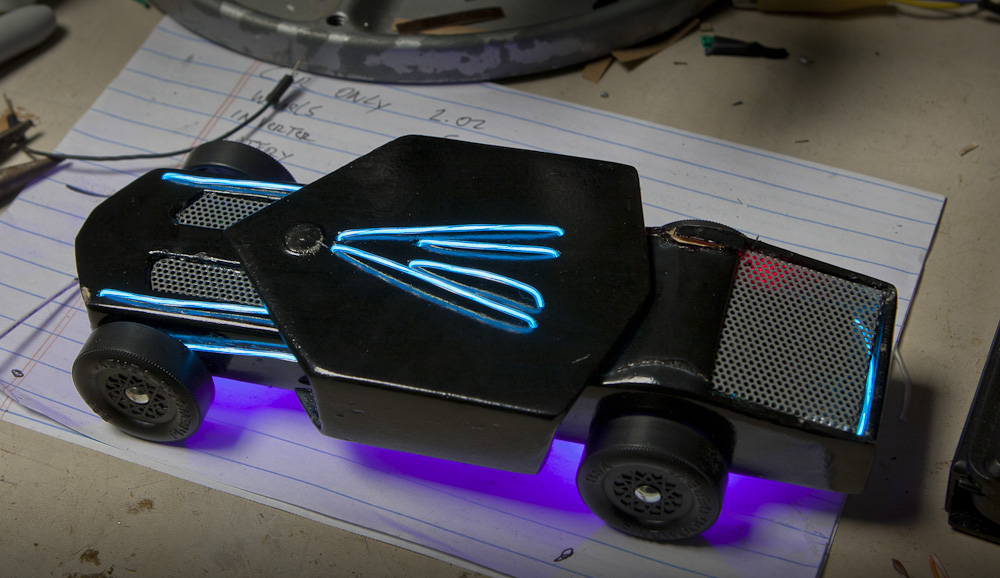 As I have said more than once, I was an 80’s kid. As you know, Tron Legacy came out. While I was a little disappointed in the story, I was totally in love with the art. It was beautifully done with so much attention to the little details. If they paid as much attention to the story, it would have totally rocked… but I digress… I wanted to make this years pinewood derby car in the styling of the new movie.
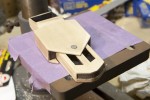
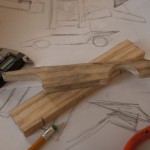
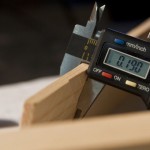
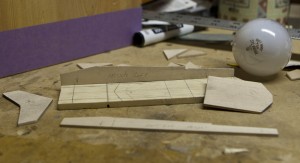 I decided to take a different approach to the building of my car. Instead of starting from a block and working down, I started by sawing the block down to a thin slab and adding to it. Using thin pieces of wood, I carved each piece of the car with the coping saw and / or razor knife. The caliper helped a lot. The wood is soft enough that I could mark the wood easily. I used super glue to keep the weight down. Then I used wood filler to fill in the the cracks between the pieces.
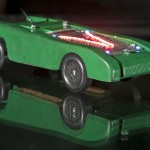
 The overall design is something between an F-16 with no wings and a Comaro. The jet intake, rear, hood grill, and the front grill were from an old set of computer speakers. They were of course rear lit as well. The hood was to have plexiglass inbedded in it, but I could not get the fit to not look chunky so the idea was scrapped for the metal.
In the past I have used screws to hold little things like this together. This year I wanted to make it easier to access the guts. I used a little neodymium magnets to hold the top onto the bottom of the car. The only thing I do not like is the bump in the middle of the top piece. There was supposed to be a rear spoiler, but I did not have time to built up the back end to add it.
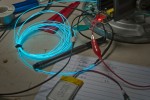
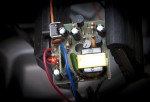
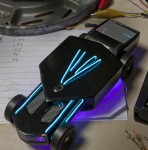
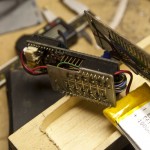
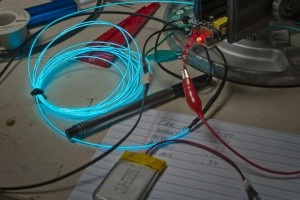 I thought through many different ways to achieve the glowing linage. I bought and experimented with everything from science grade glow in the dark paint, back lit plexi, UV reactive paint with UV LEDs, and eventually settled on EL wire. It is what was used in the movie for the costumes. It was the best look for the size. I had to come up with a way to fit the inverter in the car, be able to turn it on and off, and most importantly, how to power it. I opened the case that the inverter came in and hacked the board so I could move the batteries and switch to the middle of the car. For weight and size reasons I chose to use a small LiPo battery. The last thing I added was 0805 SMD UV LEDs for ground effects and head lights. The effect was very slick. Another nifty (and unintended) effect was that the inverter has a high pitched whine to it. In addition to looking very electric, it also sounded very electric.
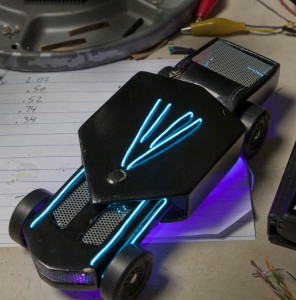 Triumph and agony…
Sometimes when you work on things for too long, you loose your mind. This can be a dangerous thing if not to yourself, then to the object being worked on. I spent a lot of time priming and painting the car so it had a near ‘real car’ paint job. I mean, I spent a stupid amount of time painting, sanding, painting, sanding… Then it’s time to put the wheels on. If you have ever built a pinewood derby car, you know that this last step is the time where most cars get damaged, and this build was no different. It was 3 am(ish) and I had to finish the thing as it would be checked in the following day. I put the front wheels on first and they went on without issue. The third wheel went on without issue. On the 4th wheel, as I was tapping the nail in, I heard ‘CRACK’. I put my head down on the workbench and let out a big sigh, pretty much knowing what had just happened. After about 30 seconds or so, I decided to look at what the damage was. The top of the car (in the back) had caved in. This was not something that could be repaired easily, or quickly. I had to get up for work in a few hours and it needed to be turned in right after work. There was no time. I chose to get it at least track worthy. I glued the heck out of the broken area. To add insult to injury, when I picked up the car to look the damage closer and the car fell out of my hands and landed beak down. While it did not break, it added another nice little ding to the killer paint job. There is a lesson in here somewhere… I am not sure what it is yet… but it’s there ;0) .
So, it was pinewood derby time for the Cub Scouts again. My son’s pack has a race for the adult kids too. I had been plotting my car since last years races. I wanted to really light the thing up. Last year I had working head and tail lights, but this time I wanted bigger and better. I was just not sure what form it would take. I had considered many options. The most predominant idea was using an accelerometer to change the light settings based on force. The problem was that I wanted the lighting to stay very minimal until race time so that the surprise factor would be maximized.  I was leaning heavily towards the Arduino Pro 3v due to it’s nice and tidy size. After more thought I started heading away from the accelerometer and started thinking about using an XBee to control the Arduino remotely. Then while shopping at Sparkfun one day, I stumbled upon the Funnle IO board and that locked the plan together.
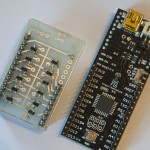
Funnel is an Arduino based board, with the added benefit of having an on board Xbee socket. Plus it is tiny, has a 3.2v line in (for LiPo), and a LiPo charger onboard too.
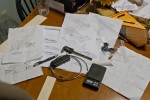
I ordered the stuff from Sparkfun and started designing the circuits. The mental picture was to make 2 stripes that ran down the sides of the car. These would be able to blink, pulse, fade, and ripple. Then on the 4 corners I wanted to have a very bright strobe light effect that would strobe at about 1 pulse per second. The idea was something like a jet preparing to take off and the taxiing lights. I put together a breadboard mockup. I decided to use the 6 PWM outputs for the stripes. This way I could make them flow however I wanted. I worked on many different ideas for making a slow PWM roll. I finally found that to make the lights really roll along, I needed to have more than one set as the rolling motion is much more pronounced when repeated in a longer strip. The thing started to take form.

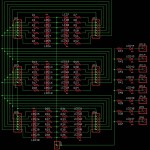
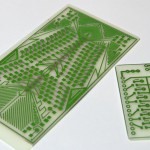
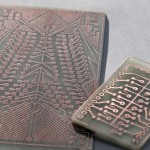
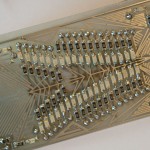
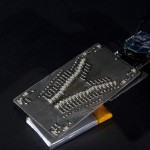
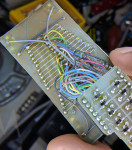
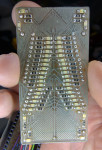
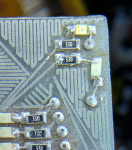
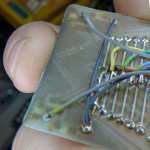
I decided to use 3 sets of 6 LEDs on each side, but instead of running down the sides, they would actually sit on top of the car like some evil menacing engine. I did not want big bumpy 5mm LEDs all over it (which actually might just be cool), so I went with surface mount. All the LEDs and resistors are 1206. 36 LEDs at 20ma each would easily exceed the max draw for the Funnel, so I built a driver board to take the load off of the FIO. The driver board was nothing fancy, just a few small 2222 transistors (sot-23).
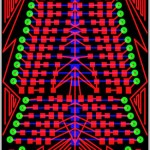
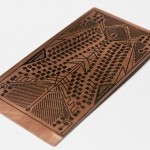
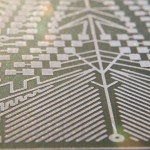
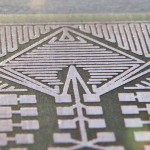
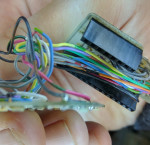
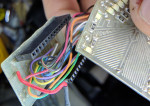
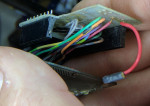
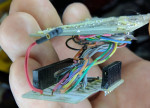
One thing I had a great amount of fun with was designing empty spaces on the board. Once the board was designed, it was quickly clear that though functional, it was hardly cool looking. There was a still ton of blank space, so I decided to decorate the PCB. It was arts n crafts time with Eagle Cad. So, I spent a couple of hours just playing with shapes. By about noon the next day, I had the board etched, and all soldered up, and was ready to start testing. I uploaded the code to the funnel and started to play. I had some problems with one the channels of strip lights. It turned out to be a transistor that was not completely seated on the board. It looked soldered, but when I heated it up and pushed down on it, it just sank. It was a quick fix and it worked great from there on out. I made sure that the xBee was working, but mainly stayed on the ftdi cable during the remainder of programming and testing.
After designing the car, I needed to route out the innards where everything would fit. This was a little easier on paper than it was in wood. Eventually, it started to come together. Making a long story short, I got everything together and it worked great. This was my first real Xbee project. I really liked that I got feedback from the car which was sitting like 60 feet from me. Of course I had to program the Arduino to do so. All I needed to do to trigger an effect was just type a letter into the serial command box in the Arduino IDE. I had about 14 different things I could have it do.
Edit: (News) – My car is on Sparkfun’s Front Page!!! Call it my Andy Warhol 15 seconds. :0)
Edit: (Clarification) – No, I am not employing a “joule thief” circuit in the car. We get to name the cars, and I felt that the name fit. Some folks have asked if this is an “official scout issued” PWD kit. Yes it is, but I used 2 kits. The finished car is legal weight, but just scraping by. The wood weighs almost nothing as it is more or less, a shell. When I weighed it after finally getting all together, it was over by quite a bit. I had to hollow out just about every place that was thick enough to be drilled. I avoided the spaces right around the wheel grooves as I did not want it to bust through during the race. If you look at the front picture on the video, in the reflection in the glass you can see where I had hollowed out the sides. Drilling a car that was already completed was a pucker factor of about 12. I really thought I was going to blow out one of the sides. But even that was not enough, when it raced, it did not have the left screw in place as it pushed the car over the legal weight of 5 oz..
Eagle Boards, Schematics, and Arduino Code


