This was the public video I put together after our company went public on April 1st 2010.
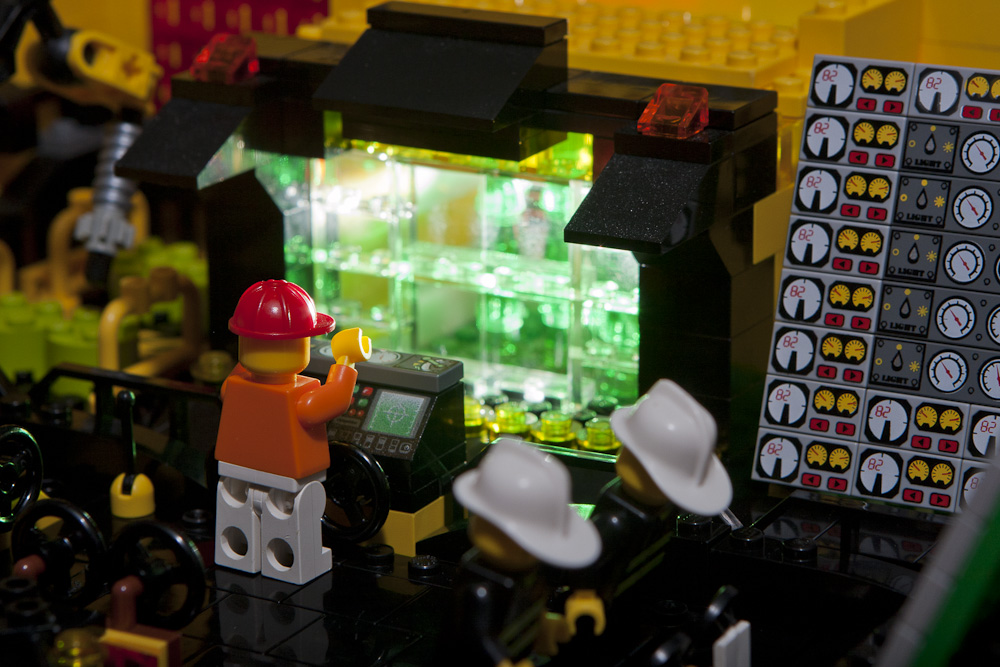
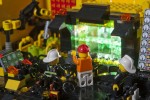
My son and I were playing with Legos a while back. I started playing with this arm piece that looked rather menacing. As the thing grew, I knew it needed an environment to go in. Once you go down that road, it’s all over. I then had to come up with other stuff to put in there with it. Then those things were cooler than the robotic arm thing. One thing led to another and eventually I had a full on nuclear looking power plant.
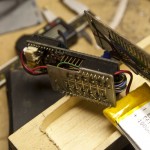
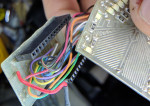
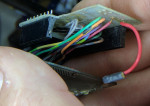
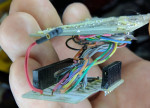
So, it was pinewood derby time for the Cub Scouts again. My son’s pack has a race for the adult kids too. I had been plotting my car since last years races. I wanted to really light the thing up. Last year I had working head and tail lights, but this time I wanted bigger and better. I was just not sure what form it would take. I had considered many options. The most predominant idea was using an accelerometer to change the light settings based on force. The problem was that I wanted the lighting to stay very minimal until race time so that the surprise factor would be maximized.  I was leaning heavily towards the Arduino Pro 3v due to it’s nice and tidy size. After more thought I started heading away from the accelerometer and started thinking about using an XBee to control the Arduino remotely. Then while shopping at Sparkfun one day, I stumbled upon the Funnle IO board and that locked the plan together.
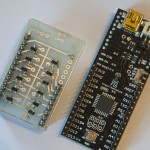
Funnel is an Arduino based board, with the added benefit of having an on board Xbee socket. Plus it is tiny, has a 3.2v line in (for LiPo), and a LiPo charger onboard too.
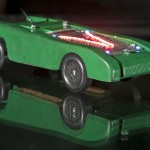
I ordered the stuff from Sparkfun and started designing the circuits. The mental picture was to make 2 stripes that ran down the sides of the car. These would be able to blink, pulse, fade, and ripple. Then on the 4 corners I wanted to have a very bright strobe light effect that would strobe at about 1 pulse per second. The idea was something like a jet preparing to take off and the taxiing lights. I put together a breadboard mockup. I decided to use the 6 PWM outputs for the stripes. This way I could make them flow however I wanted. I worked on many different ideas for making a slow PWM roll. I finally found that to make the lights really roll along, I needed to have more than one set as the rolling motion is much more pronounced when repeated in a longer strip. The thing started to take form.

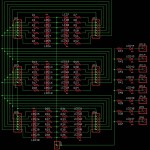
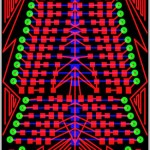
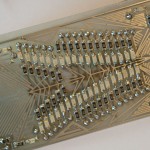
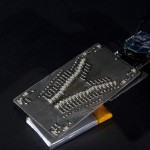
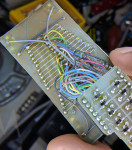
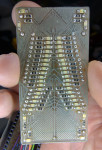
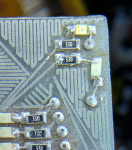
I decided to use 3 sets of 6 LEDs on each side, but instead of running down the sides, they would actually sit on top of the car like some evil menacing engine. I did not want big bumpy 5mm LEDs all over it (which actually might just be cool), so I went with surface mount. All the LEDs and resistors are 1206. 36 LEDs at 20ma each would easily exceed the max draw for the Funnel, so I built a driver board to take the load off of the FIO. The driver board was nothing fancy, just a few small 2222 transistors (sot-23).
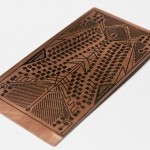
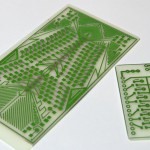
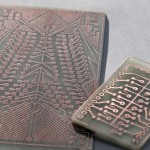
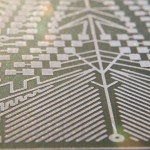
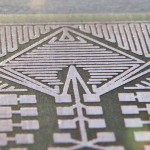
One thing I had a great amount of fun with was designing empty spaces on the board. Once the board was designed, it was quickly clear that though functional, it was hardly cool looking. There was a still ton of blank space, so I decided to decorate the PCB. It was arts n crafts time with Eagle Cad. So, I spent a couple of hours just playing with shapes. By about noon the next day, I had the board etched, and all soldered up, and was ready to start testing. I uploaded the code to the funnel and started to play. I had some problems with one the channels of strip lights. It turned out to be a transistor that was not completely seated on the board. It looked soldered, but when I heated it up and pushed down on it, it just sank. It was a quick fix and it worked great from there on out. I made sure that the xBee was working, but mainly stayed on the ftdi cable during the remainder of programming and testing.
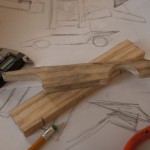
After designing the car, I needed to route out the innards where everything would fit. This was a little easier on paper than it was in wood. Eventually, it started to come together. Making a long story short, I got everything together and it worked great. This was my first real Xbee project. I really liked that I got feedback from the car which was sitting like 60 feet from me. Of course I had to program the Arduino to do so. All I needed to do to trigger an effect was just type a letter into the serial command box in the Arduino IDE. I had about 14 different things I could have it do.
Edit: (News) – My car is on Sparkfun’s Front Page!!! Call it my Andy Warhol 15 seconds. :0)
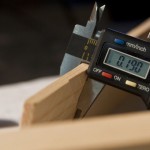
Edit: (Clarification) – No, I am not employing a “joule thief” circuit in the car. We get to name the cars, and I felt that the name fit. Some folks have asked if this is an “official scout issued” PWD kit. Yes it is, but I used 2 kits. The finished car is legal weight, but just scraping by. The wood weighs almost nothing as it is more or less, a shell. When I weighed it after finally getting all together, it was over by quite a bit. I had to hollow out just about every place that was thick enough to be drilled. I avoided the spaces right around the wheel grooves as I did not want it to bust through during the race. If you look at the front picture on the video, in the reflection in the glass you can see where I had hollowed out the sides. Drilling a car that was already completed was a pucker factor of about 12. I really thought I was going to blow out one of the sides. But even that was not enough, when it raced, it did not have the left screw in place as it pushed the car over the legal weight of 5 oz..
Eagle Boards, Schematics, and Arduino Code
 The following nonsense is a pseudo blog I wrote on the BYOAC Forum back in 2006. It is about the construction of my arcade cabinet “BLACKOUT”. There were 5 full pages of threads to wade through. I have tried to edit it down into some sort of understandable form and added information for those who are not familiar with the retro arcade world. Knowing that not everyone would have the same background, I decided to also write a preface to the build log. It may give a little understanding as to why one would be daft enough to take this on. You will find that many of the folks who built one of these have similar stories. If ya don’t care, then skip it and head to the build.
PREFACE
I was an 80’s kid. I grew up with Atari being the sole home video game system. The word Nintendo was not part of any child’s vocabulary. It was the beginning of a craze. We first moved to Texas when I was 9. My friend Clint (who lived in the apartment below us) said that I needed to come with him and to bring quarters. There was a golf and tennis club behind the apartments we lived in. I found a quarter and followed him to the club house. Though it was the early 80s and it still reeked of the 70s. We found a way to sneak in the side door of the place. It was classy with orangish walls and brown smoky glass panels separating the various rooms. He pointed at a large box taller than me. It had a TV inside of it, and a console of buttons just under the screen. Asteroids, he said. Did you bring quarters? I showed him my quarter. That’s not enough he told me. I pointed out that it only cost $.25. I did not understand. He explained the game and put in a quarter to show me. It looked like fun. His game ended remarkably fast (He was not very good). He said it was my turn. He had a weird look in his eyes. It was the pusher giving the future junkie his first fix. The quarters were lined up on the glass just above the control panel. The quarter was inserted. It made a deeply satisfying kachink. The player one button started to flash. The screen told me to press start, and I did. The music started, my ship appeared, and I started to play. My game ended remarkably fast (I was not very good). My heart was racing. I just stood there staring at the screen. I did not want it to be over. My one quarter was not enough. I was hooked.
I was a kid with a near obsessed need to do better at these things, one quarter at a time. Fortunately for me there were many places near by that had games. There was a little movie theater just inside of a strip mall that went out of business. They turned the lobby into an arcade. I lost a lot of money there. They had so many great games like Donkey Kong, Frogger, Bosconan, Pleades, Galaga, Galaxian. They had 4 small rows with about 4 or 5 games in each. On the back wall there were few pins as well. At that time though, I was not into the pinball machines. I think that this was there that I learned that if you told the guy behind the glass that the machine stole your quarter that he would come over, unlock the door, and click in a few credits. But they got wise to us far too quickly.
 I also helped the convenience stores stay in business. Between Mr. J’s and 7-11, I laid down a few rolls of quarters. There I found Roc n’ Rope, Time Soldiers, DK3, Cloak and Dagger, Crystal Castles, Mappy, Super Mario Bros., and Dragon’s Lair. When I got a little older, I started to go to Castle Golf and Games. The bonus there was that it had a Malibu Grand Prix right next to it with even more games. We would ride our bikes for close to an hour to get there. We would often waste all our allowance and birthday money there. It was at these two places that I found Tron, Gauntlet, Gorf, Centipede, Space Fury (Stupid Alien always taunting me), and Red Barron which was one of my favorites for a long time. Castle even had a Black Hole Pin which is still one of my all time favorite pins. Castle had rows and rows of games. It was a great place until they started to charge $.50 for the games (greed).
Over the years, arcades started to die off. Home consoles started to eat up all the quarters that people used to put into the machines, and most of my hang outs disappeared. Though it was sad, in some way, I suppose it was a good thing. I got to start keeping most of my money. I tried several of the consoles, and to some extent I enjoyed them. The problem was that they never had the same feel as the real thing. There was something to the full sized joystick, the concave buttons that you could really hit, the sound and vibration of a cabinet pushed into distortion because the volume was set far too high. Another thing is that the games changed when consoles took over. Eventually I left my kidhood behind. I would occasionally find a game here and there and drop a couple of quarters into them, but money became more valuable, and that sort of closed a chapter of my life.
I grew up, got married, and started a family. Somewhere around 1997 or 8, I found MAME. This was an wonderful discovery for me. I really tip my hat to the guys who have put countless hours into developing it and making it work so well. I got to play so many of the games I thought were all but gone. My only gripe was that my arcade memories did not include sitting in front of a computer tapping away on a keyboard. It did however, include standing in front of a big wooden box, and beating the hell out of it. Several years later, I stumbled upon the BYOAC website and I started reading about all these people, who were actually building their own arcade machines. I read this site nearly daily for several years. Eventually, I designed and built a desk top arcade console.  It had real buttons and real joysticks. I hacked a computer keyboard so it would interface between the computer and buttons. It worked very well, and gave me a little more of that feel that I wanted. Sadly, I still was not fully satisfied. Still reading the BYOAC pages and forums, I started to think about building a full sized cabinet. I designed, redesigned, and re-redesigned a cabinet of my own.
I thought about all my favorite games and realized a totally unappreciated artform. So many games had very unique cabinets. If you look at a Tron, Asteroids, and Ms. Pacman, you will see very different designs and methods of building. I found a great site called the Killer List of Video games or KLOV. There you can find listings, pictures, and information about the full sized games. I went to arcade auctions. I started to study how they were made. There is actually an unrealized art in all of this. The designers actually produced very nice machines. There were so many great shapes.
Finally I started to close in on the design of my machine. I decided that 2006 would be the year I built my machine. I tend to be a perfectionist on things I create. There are folks who say they can build one of these in a weekend. I really do not know how that is possible, but sure, whatever, have fun. I would take my time and think it through. I saw a lot of examples of cabinets with a rats nest of wires inside. I have seen very poor examples of structure, and worse examples of paint (hey, it’s important). After a long bit, I realized what it was that I was after and clearly what I was not after.
A word of warning. The log is way long winded (As if I could somehow be less). It is my dream arcade machine, and it is a beast. In total, it took a little over a year to build. There were many steps to get it completed. I thought about consolidating the log into a general overview, but as I re-read it, I realized that it was really a diary of the build. It is more than a simple how to. It contains so much of the mindset and reasoning as to why I chose to do what I did. It provides a fairly clear reality to someone who might be considering building one. Quite honestly, though I am glad I built the machine; it was not always a joyous and fun time. It was frustrating, hard, and caused more than one ripple in my marriage. It was far deeper in scope than it might seem at first glance. The other thing I discovered while re-reading this, was how poorly written it was (not that it is much better now). I am not a writer by nature. But I am taking the time to try and neaten up, correct the horrendous spelling issues, and fill in some holes that I may have left. Now that I am removed from the situation by several years, there are several things that I have thought of conceptually, different approaches, and life lessons. I will notate these extras (AT = After Thought).
Actually, to be honest, it is still not totally finished. There are a few little things that are more or less things I needed to do for me. But all in all, it is complete, and fully playable.
The following is my account of the build process (Said in your best Jack Bauer voice).
To start at the beginning, head on over to January 2006.
OpToday DOME Open from MYX on Vimeo.
In 2009 we put together a graphics package for an convention. We then needed a show open. The original renders that I used in this piece were all frosty white with the only color being the red ribbon seen flying through the city. The original color can be seen at around 15 seconds in and at the end. I wanted to push the colors more in line with the show, and being the many folks had already seen the all the white footage, I decided to try to make this all ‘night’ looking. It was originally rendered as rgb black and white, so while it looked B&W, it really had traces of various color running through it, so it was not just a simple inversion. Being that the red was a color used in the show, that could not be inverted either. It was a fun puzzle to see what little pieces I could use to plus it into something interesting and usable. In this case I edited first so I did not have to fight any extra footage that I did not need to fight.
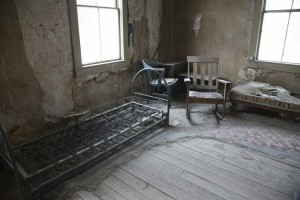
This is just part of a much larger piece. Many folks would be seeing this so I wanted to make something that would quickly grab attention. Everything is built from stills. My favorite, is the third little vignette. I worked on the background for quite a while. The original photo was somewhat blown out in several areas. I built back in the window. Then I made some dirty glass. The glass was kept semi transparent so that a deeper background could be added. I worked on the baby for a while and eventually found the look I was going for. I selected an appropriate outside environment and put the whole thing into 3D within AE and finally did an overall color treatment.
The following video shows the progression of the baby image build up.

